Overview
For this challenge, we will use Wireshark to analyze the exploitation of CVE-2023-32315. We will apply various filters to keep our investigation focused on suspicious activities and to pivot on our findings.
Scenario
In the company, one of our teams uses Openfire, an XMPP-based chat server for their communications. Recently, the L1 analyst detected suspicious activity on the server, including abnormal login attempts and traffic spikes. Further investigation suggests a potential exploitation of CVE-2023-32315, a critical vulnerability in Openfire allowing remote code execution. To confirm this, the L1 analyst captured a packet capture (PCAP) of the server’s network traffic. As an investigator, your task is to analyze the PCAP, identify any signs of compromise, and trace the attacker’s actions.
Q1
How many GET requests are there in total?
We can use a simple filter to determine the total number of GET requests found in the pcap.

Filtering for GET requests
After applying the filter, we can check the total number of displayed packets at the bottom of the screen.
Alternatively, we could use the Packet Counter view found in Statistics -> HTTP -> Packet Counter.
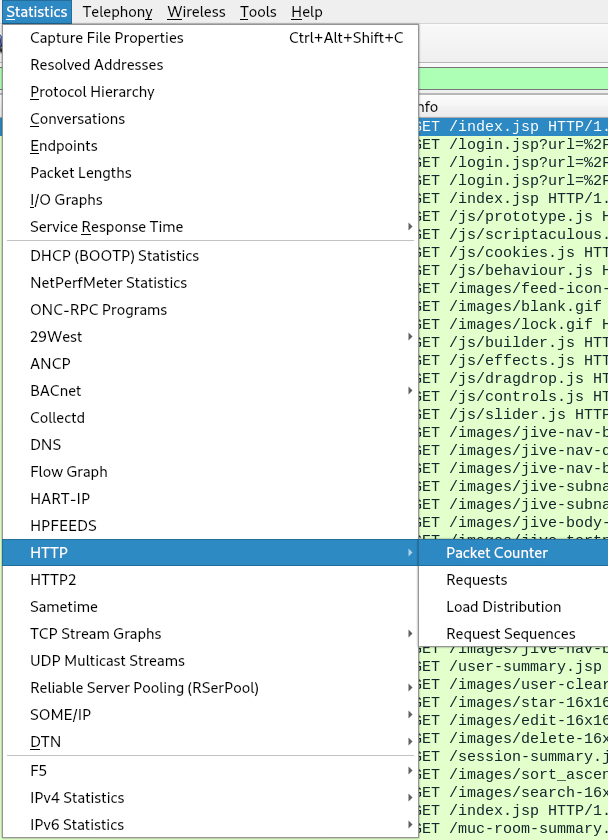
Packet Counter option under Statistics
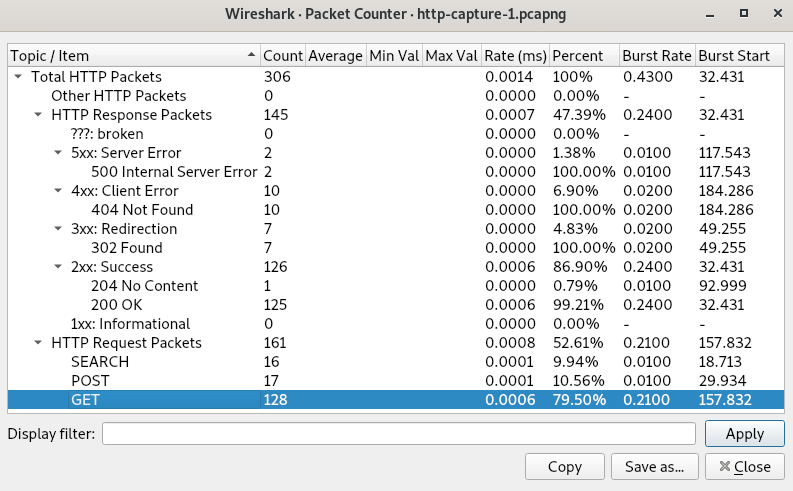
Stats of the various HTTP requests
Answer
128Q2
What is the host value in the first HTTP packet?
Wireshark provides this information under the HTTP header section.
We can either apply the previously mentioned filter for GET requests or filter simply for HTTP.
Let’s apply a simple HTTP filter so we can see other types of requests going forward.

Filtering for HTTP

Host value
Note: It is important to keep in mind that this IP address corresponds to the server being targeted by the attacker.
Answer
192.168.18.155:9090Q3
What is the CSRF token value for the first login request?
With our HTTP filter applied, we can check what resources were requested.
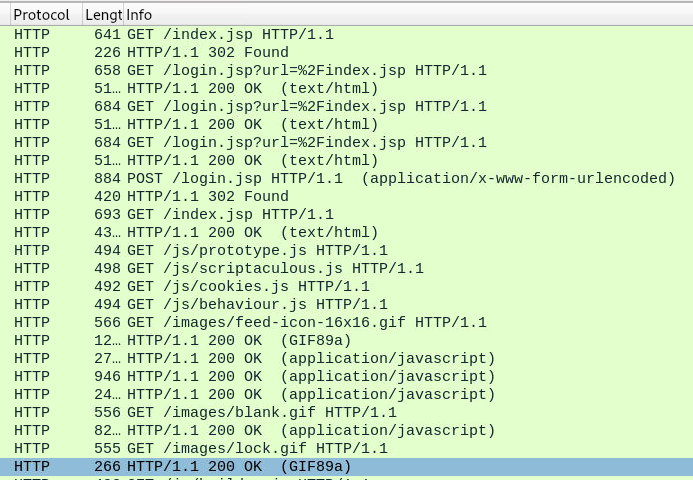
HTTP Requests and responses
Among the first HTTP requests, we can see multiple GET requests to login.jsp before a POST request to the same page.
We’ll select the POST request and inspect the data that was sent.
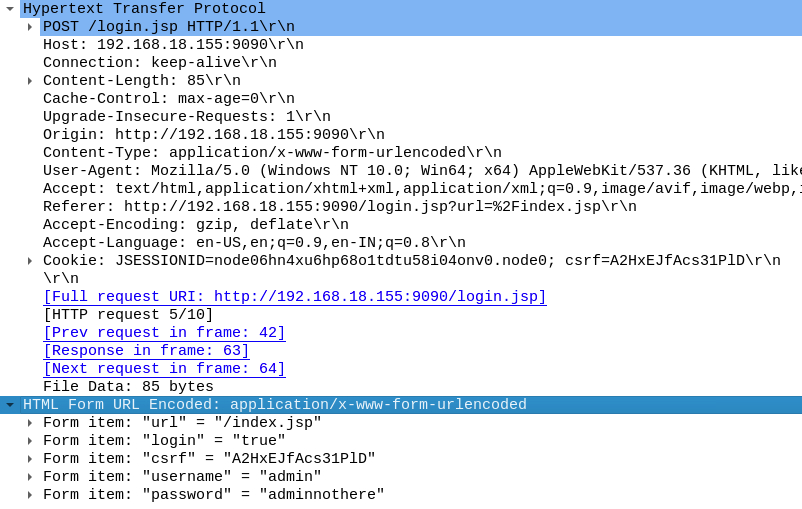
Values sent in the HTTP POST request
In the data sent, we can see a CSRF value sent within the Cookie field as well as within the HTML Form URL data.
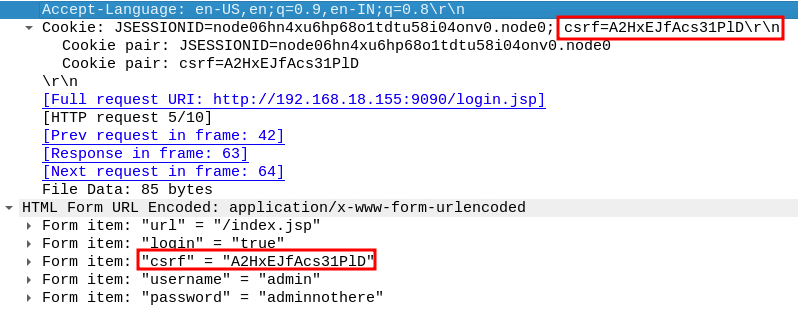
CSRF values
Answer
A2HxEJfAcs31PlDQ4
What is the password of the first user who logged in?
The form data we inspected in the previous question also contained plaintext login credentials.

Login credentials
Answer
adminnothereQ5
What is the first username that was created by the attacker?
Our findings so far only indicate an initial login, but we do not have evidence that the login was by a threat actor.
Let’s see what other IPs were communicating via HTTP with the server.
To do this, we’ll open the “Conversations” statistics.

Statistics Menu
With the conversations screen open, we can sort by the number of packets or bytes transferred to see who communicated the most with the server.
Note: By having the http filter applied and using the “Limit to display filter” setting we can see only the IPs that were recorded using HTTP in the pcap.
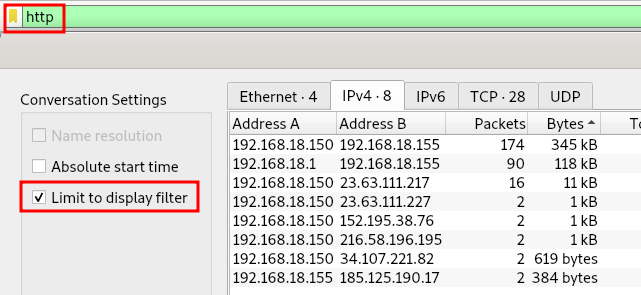
Statistics for HTTP conversations
Alternatively, we could further limit our results to only include traffic to or from the server.
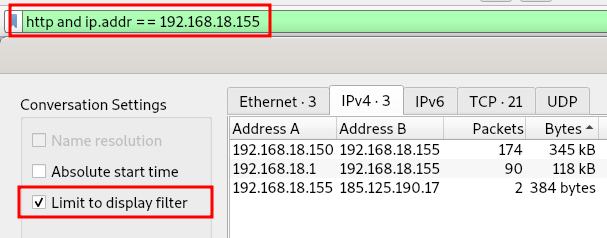
Statistics, restricted to server and http
The results show that 192.168.18.150 communicated the most with the compromised server, so we’ll limit our queries to traffic between this IP and the server.
We can filter for these IPs by adding ip.addr == 192.168.18.150 and ip.addr == 192.168.18.155 to our filter or by right-clicking the address and selecting A<->B as shown below.
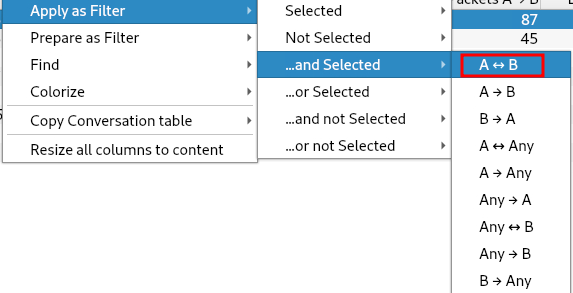
Filtering for traffic between the two IP addresses
The resulting filter should look similar to:

Filtering for http traffic between the two IPs.
With the filter in place, we can start inspecting the traffic.
Among the first few requests from the .150 IP are requests to user-groups.jsp and user-create.jsp.

Initial requests from the .150 IP
Let’s analyze the first request to user-create.jsp.
We could, of course, read all the details of the web request in Wireshark, but let’s make it a bit easier to read with CyberChef.
To clean up the output we can use the URL Decode and Find/Replace operations, as shown below.
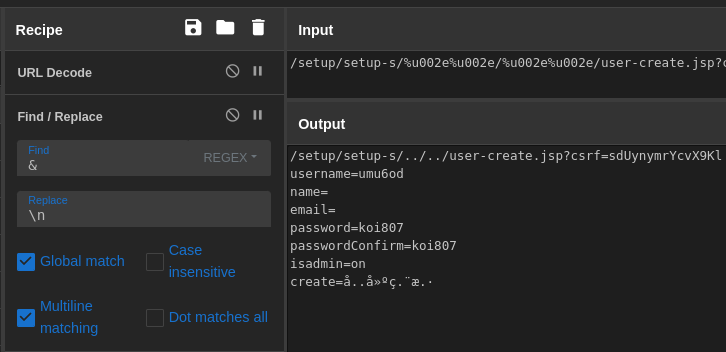
Cleaning the data in CyberChef
Reading the results, we can see the username, password, and admin status of a newly created user.
Answer
umu6odQ6
How many user accounts did the attacker create?
We already noted that there was another request to user-create.jsp, but let’s filter for this value to ensure there weren’t more requests further in the traffic.

Filtering for user-create.jsp
The results for this query return the two requests we previously noted.
While we have the results, we should analyze the details of the other user creation.
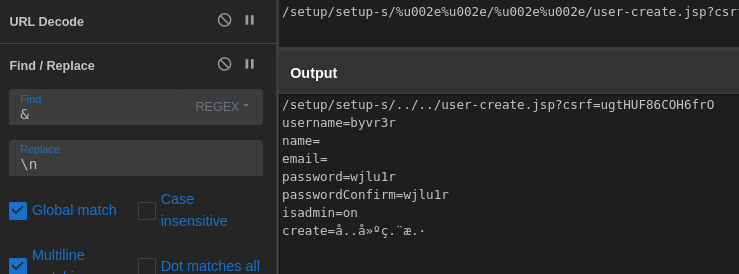
Data from the second user-create request
With that, we can confirm that two unique accounts were created with admin privileges.
Answer
2Q7
What is the username that the attacker used to log in to the admin panel?
So far, we have uncovered the creation of two admin accounts with random usernames. Furthermore, the accounts were created by the same IP, and in a short period.
Given these findings, we’ll continue investigating this IP and narrow our scope by filtering for POST requests.

Filtering for the IP and POST requests

Results
There are only 5 matching packets, and the first one is a POST to login.jsp.
Analyzing the packet details, we can see one of the recently created accounts was used to login.

HTML Form data
Answer
byvr3rQ8
What is the name of the plugin that the attacker uploaded?
Looking through the following POST requests, we can see a request to plugin-admin.jsp with an uploadplugin argument.

Request to plugin-admin
We can analyze the packet’s associated MIME data to determine the name of the uploaded plugin.

Name of the uploaded .jar file
Answer
openfire-management-tool-plugin.jarQ9
What is the first command executed by the user?
Following the plugin upload, we can see three POST requests to the plugin’s cmd.jsp endpoint.

Requests to cmd.jsp
The first request doesn’t appear to contain any command execution, so we’ll move on to the second where we can see the executed command in the HTML Form data.

Initial command execution
Answer
whoamiQ10
What is the last command that the attacker used on the server?
The final request to cmd.jsp in our results shows the attacker used netcat to run a reverse shell.

Reverse shell execution
Although this is the final command run on this session, it may not be the final command executed on the target.
We’ll need to expand our scope to include traffic on port 8888.
We could either replace our current filter with tcp.port==8888 or we could append it to our current filter.

Expanding the filter
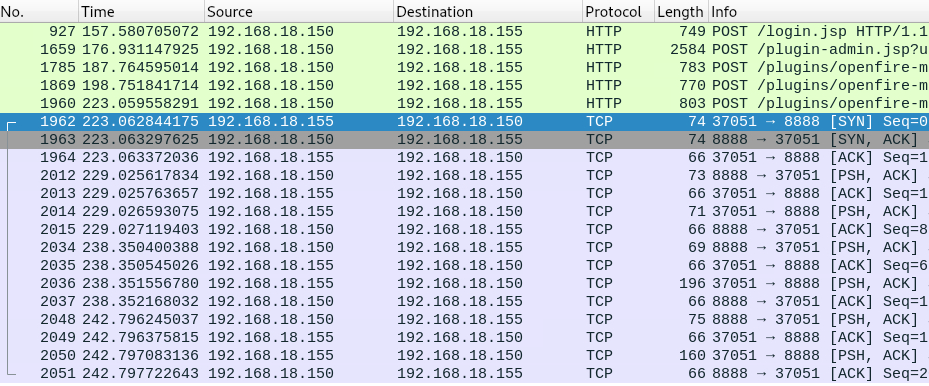
Results
The results show that following the netcat execution, traffic was exchanged between the server and attacker over port 8888.
We’ll use Wireshark’s “Follow” feature to make the traffic easy to read.
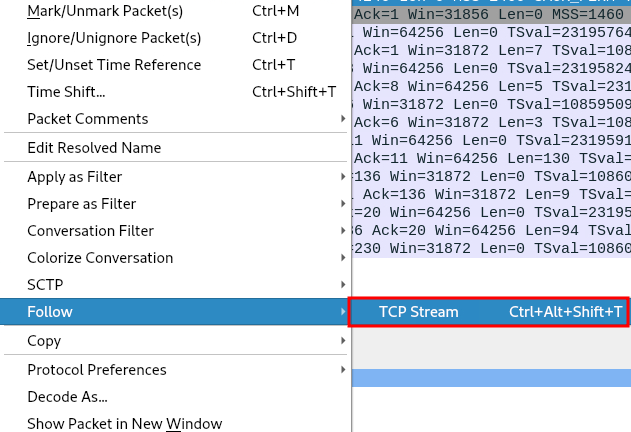
Follow TCP Stream
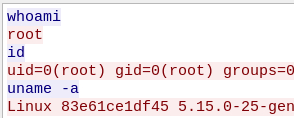
Data sent in the TCP stream
The results show the attacker ran 3 commands to gather information on the system.